Design Step 3
Design Step 3 was mainly about evaluating our alternative design concepts, creating a life cycle assessment for our project and learning more about 3D modeling. We did so through research documents, following tutorials for Onshape 3D modeling, brainstorming on Padlet, and Project Matrixes. To better our project and keep progressing towards our end goal, we got feedback from our mentor and teacher. This step was split into three main parts, which are shown below.
Part 1:
- Revise the 4-6 page proposal, classification scheme and sketches
- Identify + weigh evaluation criteria
- Create decision matrix
- Interpret results
- Select best concept
Revisions
The first part of Step 3 was to revise three main documents. These documents were intended to narrow down our design and help us choose specific parts of the product. The first document was the 4-6 page proposal. This proposal set the outline for the project, providing proof of extensive research to ensure a solid base for our project. There were a lot of requirements for the proposal, so it took many revisions to get it perfect. The revised version is shown below.
The first part of Step 3 was to revise three main documents. These documents were intended to narrow down our design and help us choose specific parts of the product. The first document was the 4-6 page proposal. This proposal set the outline for the project, providing proof of extensive research to ensure a solid base for our project. There were a lot of requirements for the proposal, so it took many revisions to get it perfect. The revised version is shown below.
|
The next document that needed revision was the classification scheme. We had the concept wrong at first, so it too a really long time to get it completely finished. The final product is shown to the right. The point of the classification scheme is to break the vaccine patch into 5 main functions, and break each function into 4 main concepts. After breaking it down and researching, the idea was to choose the concept that would work most successfully for each function that needed to take part.
|
|
Decision Matrix
The next task was to create the decision matrix, which allowed us to compute how much each concept and function mattered for our project. The goal was to come to a final decision for which concept was the best/most needed for our design. The first step for this was to identify and weigh the evaluation criteria. The decision matrix is very precise and specific, so we needed to deeply read into it before starting the document. We were given examples and instructional documents, all of which were very thorough, so it took a great amount of reading and analyzing to understand. Once we understood, we created the document, which is shown below. Each member of the team created their own matrix, and then we averaged them out and discussed our opinions before creating a team matrix. After looking through all four matrixes, we found that the highest score in our decision matrix was Concept 2; a vaccine patch with cheap materials, biodegradable microneedles, packaging that perfectly fits each component, and instructional pictures on the actual patch.
The next task was to create the decision matrix, which allowed us to compute how much each concept and function mattered for our project. The goal was to come to a final decision for which concept was the best/most needed for our design. The first step for this was to identify and weigh the evaluation criteria. The decision matrix is very precise and specific, so we needed to deeply read into it before starting the document. We were given examples and instructional documents, all of which were very thorough, so it took a great amount of reading and analyzing to understand. Once we understood, we created the document, which is shown below. Each member of the team created their own matrix, and then we averaged them out and discussed our opinions before creating a team matrix. After looking through all four matrixes, we found that the highest score in our decision matrix was Concept 2; a vaccine patch with cheap materials, biodegradable microneedles, packaging that perfectly fits each component, and instructional pictures on the actual patch.
Part 2:
Life Cycle Assessment, Report and Infographic
Reading: Complete all necessary reading on this page and linked pages
GOAL: The goal of this exercise is to apply life-cycle thinking to your capstone product, to map out all inputs and outputs and identify the needed materials and processes as well as the potential environmental impacts of each lifecycle stage. Look up information on manufacturing and materials used in your product components life-cycles.
Activity: Research your product life cycle and
create a google doc with your research (Title, table of contents, Raw Materials, transportation/distribution, manufacturing processes, use-re use/maintenance, recycling, wastes and emissions, citations) (Due 10/02)
then Using Adobe Spark or Canva develop LCA Infographic diagrams for your capstone product. (Due 10/02)
Vaccine Patch Life Cycle Assessment
The next task was the life cycle assessment. The point of this was to know every specific detail of what our product will be, from where every single material came from, to the manufacturing process, to where everything goes after usage (waste, recycling). This also really allowed us to think about the environmental aspect of the project, because we researched every possible chance for waste and counteracted with every possible opportunity for recycling. The life cycle assessment was done in two main documents: the research report, which went into great detail on every single aspect, and the infographic diagram, which laid out every concept in a simpler, visually pleasing virtual presentation. Both documents are shown below.
The next task was the life cycle assessment. The point of this was to know every specific detail of what our product will be, from where every single material came from, to the manufacturing process, to where everything goes after usage (waste, recycling). This also really allowed us to think about the environmental aspect of the project, because we researched every possible chance for waste and counteracted with every possible opportunity for recycling. The life cycle assessment was done in two main documents: the research report, which went into great detail on every single aspect, and the infographic diagram, which laid out every concept in a simpler, visually pleasing virtual presentation. Both documents are shown below.
|
|
|
Part 3:
3D modeling tutorials
- Log in to onshape
- Follow 7 tutorials to create 3D model and share with team
- Start modeling your own project
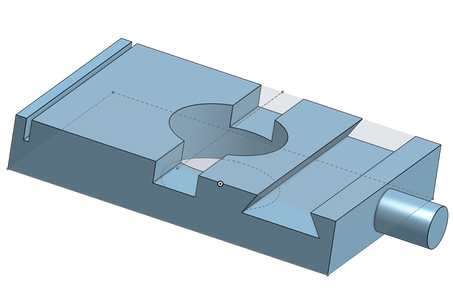
The final task in Design Step 3 was to work on 3D modeling. We learned how to use the software Onshape through YouTube tutorials, and created a product to share with our team by following the tutorials. The first 3D model created from following the tutorials is shown below.
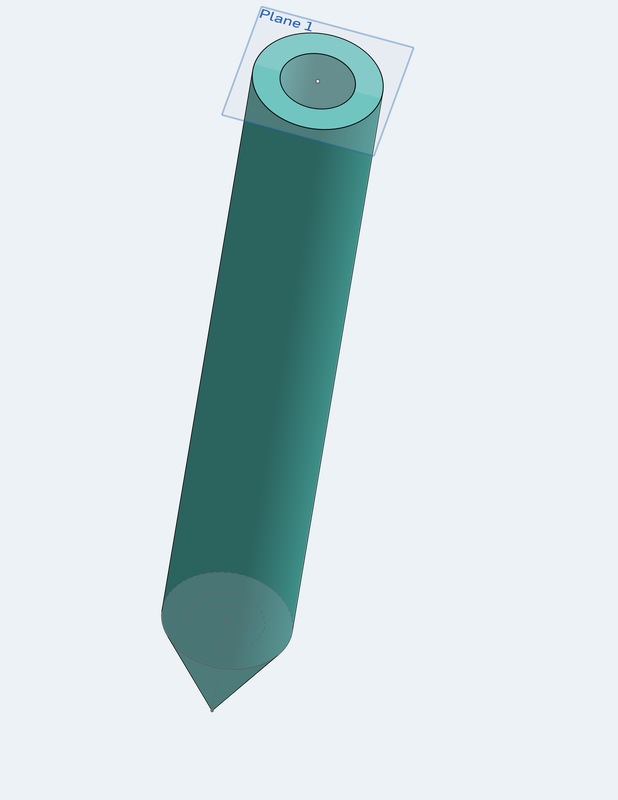
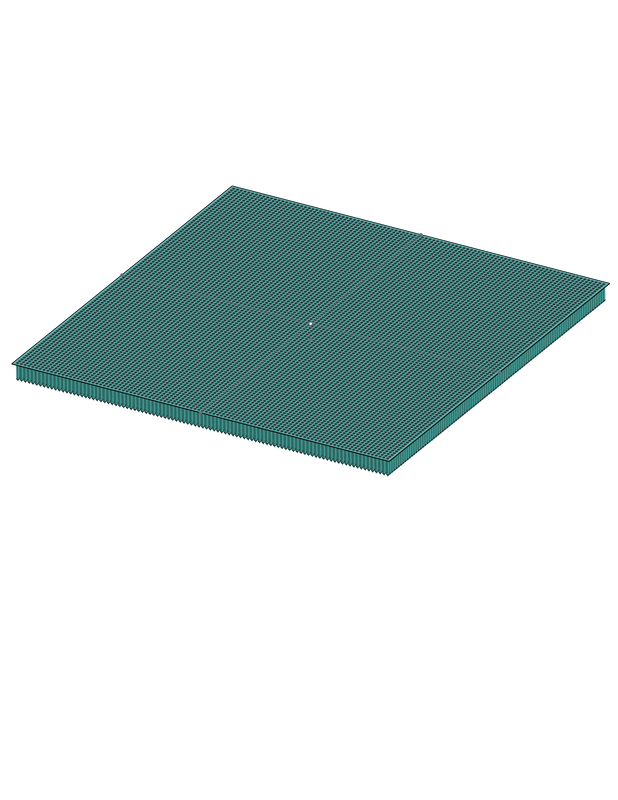
After learning how to create 3D models from the tutorials, we began working on the 3D models for our specific product. I personally worked on the design of the microneedle, and the model for that is shown below, along with the model of what the patch will look like.
|
|
